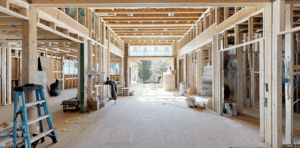
It is hard to believe that we are 11 weeks into our #RenovationOnOliverST. We’ve made so much progress! The demo and framing wrapped up without any major surprises or problems. We were able to carve out 3 large ‘attics’ on the 2nd floor for deep storage (or, if our boys have their way, as 3 ‘forts’ given that each space abuts one of the kid bedrooms). Even though we knew the dimensions of the lower level, it feels much bigger in person which is forcing us to re-think how we will use the space.
We determined that what was the previous owner’s sun room (and is going to be our storage room) was initially a garage (with a cement ceiling that had been covered by a dropped ceiling). An attached garage would have been somewhat rare when this house was built (1918) so it is fun to imagine a Ford Model T or something similar pulling in and out of the garage.

After the framing was substantially complete, the mechanical, electrical, and plumbing (MEP) rough-ins started in earnest. Rough-in is construction speak for anything installed ‘behind the drywall’. The mechanical rough-ins included running all the duct work for the heating and cooling systems. The plans laid out in detail where the ducts were to run so we didn’t hit any surprises here. The electrical rough-in included running all the new wires for switches, outlets and systems. Additionally we were installing a new breaker panel which was being installed in a different location than the current one. Our plans included an initial electrical layout but we did a major electrical walk-through during the rough-in process to fine tune light and switch placement. The plumbing rough-ins required us having most of our plumbing selections locked in so that the pieces installed during rough-in support the finished selections that we made. In addition to MEP work, we ran wires for low-voltage systems including an alarm system, Sonos speakers and a Lutron lighting system.
We sorted out a lot of questions during the rough-in phase but again we managed to avoid any major issues. During this time, the windows arrived and it was fun to see those go up! The Isokern fireplace was assembled and installed in the living room. The shingles were put up on the roof, a new stone column built on the front porch and stone re-pointing around the re-purposed sliding door in the lower level was complete.
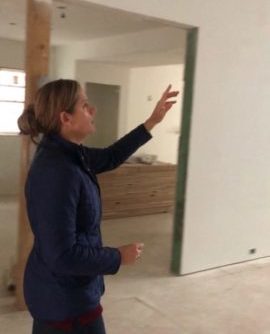
Once the rough-ins were complete, WWK called for our MEP close-in inspection which passed on the first go-round and then it was time for insulation. Prior to the insulation going up, We knew it was really important to document the interior with high resolution images. Going forward, there will will be times when we are trying to hang a picture or troubleshooting an issue and being able to see “behind the drywall” will be very helpful. We opted to have a 3D scan of the house made so that we could easily view any room from any angle. The 3D scan works like google maps where a 365 scan is made of each room every few feet. Once the tour is built, you can ‘walk’ through the house and look around in every direction. We were really pleased with the level of detail in the scan and we know it will come in useful in the future.
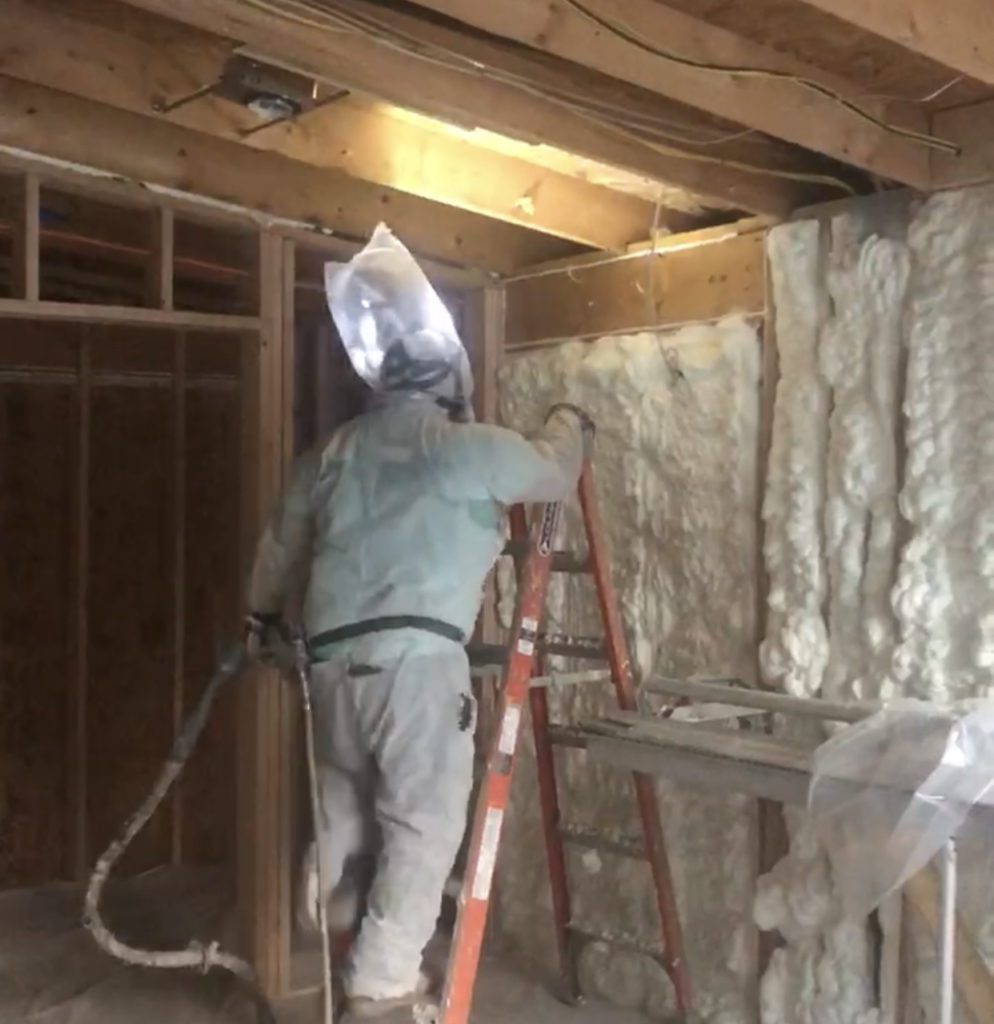
With our rough-in inspection ticket punched and our 3D tour complete, we were ready for insulation! Our insulation decision requires a little back story. When we were renovating our current house, we originally had not planned to open up the existing walls that were to remain and add insulation. However, the back left corner of the house had settled about 1″ and we could not add our addition with out jacking that corner up to be level with the right side. That process caused enough of the plaster to crack that we decided to take it all down and add new drywall. That process revealed just how little insulation was in the walls. We weighed the pros and cons of traditional batt insulation vs spray foam insulation and opted for the spray foam. It was an expensive change order that we would make over and over again if given the opportunity.
The benefits of the spray foam include:
- Lower utility bills – our bills at our current house are similar to our Glover Park interior row house that was about 1/2 the square footage
- Significantly less stress on our HVAC systems – the compressor for our upstairs unit and duct work in the attic is “inside” the insulated envelope of the house instead of in an uninsulated attic that can be 20 degrees hotter than outside on a summery day
- Noise reduction – living in the city can be noisy but the foam insulation acts as a great noise reducer helping to drown out some of the daily city noises that we would usually hear
All that to say, it was a certainty that we would call for foam insulation in Oliver St. It took 2 days to foam the entire house and it’s a beautiful sight to see! Check our our #RenovationOnOliverST Insta Story for pictures of the foaming in action (and other progress) and stay tuned for our next update!

The Stokes Group is a team of dedicated professionals who have passion for the real estate business and will advocate for our clients with the utmost honesty, integrity, and confidentiality.